Intel B560M-MORTAR WIFI (MSI MAG Series)
Published on January 1, 2023
By MatthewStevenGo
👁️🗨️ 146
26
★
★
★
★
★
Rate it
Screenshots
Description
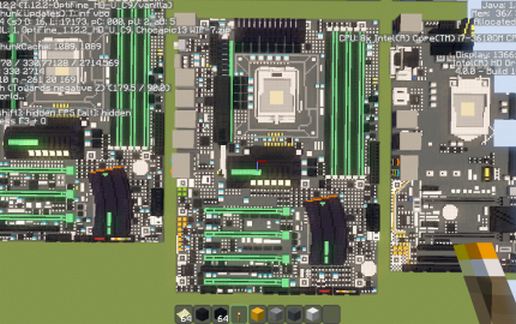
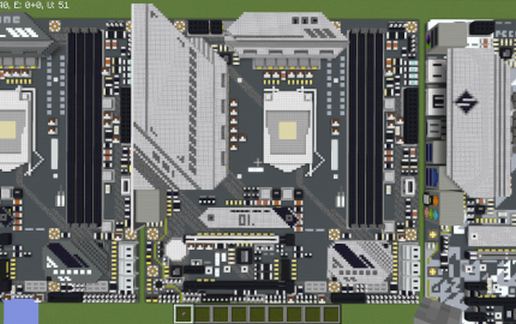
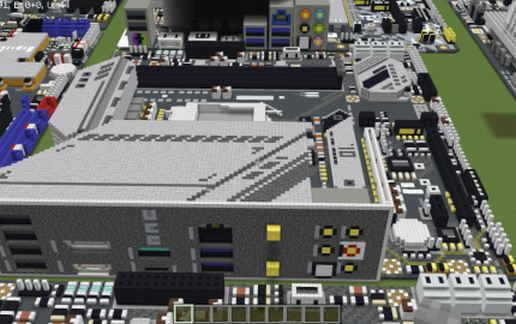
A Minecraft voxel art rendition of the MSI's motherboard of the same name built almost three months ago using 1.12.2.
Quite useful for thermal factories involving PneumaticCraft (including Thermal Series mod for best experience). If you want to convert it into a modded factory using PneumaticCraft, you MUST replace the heatsinks' blocks into compressed iron blocks (first, place it in your respective world and then place at least a compressed iron block (the nearer the better) and then replace the heatsink blocks into compressed iron blocks (first, you need to select the block of compressed iron and see its ID. You can tell it is a block of compressed iron if there are nested codes. (denoted by { } if I remember correctly) under the ID and name of the block being assigned as seen in MCEdit) If you are done replacing the blocks for heatsinks into the blocks of compressed iron, feel free to place the advanced compressors underneath the heatsinks (better if you add another cooling layer made of block of compressed iron under the compressors) and watch the temperature of the compressed iron blocks of heatsinks fly! :)
Hope you like my other works and have a nice day. ^_^
Quite useful for thermal factories involving PneumaticCraft (including Thermal Series mod for best experience). If you want to convert it into a modded factory using PneumaticCraft, you MUST replace the heatsinks' blocks into compressed iron blocks (first, place it in your respective world and then place at least a compressed iron block (the nearer the better) and then replace the heatsink blocks into compressed iron blocks (first, you need to select the block of compressed iron and see its ID. You can tell it is a block of compressed iron if there are nested codes. (denoted by { } if I remember correctly) under the ID and name of the block being assigned as seen in MCEdit) If you are done replacing the blocks for heatsinks into the blocks of compressed iron, feel free to place the advanced compressors underneath the heatsinks (better if you add another cooling layer made of block of compressed iron under the compressors) and watch the temperature of the compressed iron blocks of heatsinks fly! :)
Hope you like my other works and have a nice day. ^_^
Download: Intel B560M-MORTAR WIFI (MSI MAG Series) schematic for Minecraft
| Format | Size | Use with | |
|---|---|---|---|
.litematic intel-b560m-mortar-wifi-(msi-mag-series).litematic |
64.55 KB | Litematica (Java) — more Litematica schematics |
|
.schem intel-b560m-mortar-wifi-(msi-mag-series).schem |
10.76 KB | WorldEdit / FAWE |
|
.schematic intel-b560m-mortar-wifi-(msi-mag-series).schematic |
17.69 KB | Legacy / online installer |
|
| Install this build directly on your Minecraft map |
|
||
Auto-converted from the original format; container contents (chests, signs) may be missing.
📘 How to use with Litematica (click to expand)
- Put the downloaded
.litematicfile into the.minecraft/schematics/folder. - In game, press M to open the Litematica menu and choose Load Schematics.
- Select the file in the list and click Load Schematic.
- Position the placement where you want it and build — or paste it instantly in creative with Easy Place mode.
Requires the Litematica mod (Java Edition).
More builds: Litematica schematics.
Comments
Similar